Windows 10 installation 20H2. October 2020
This is a step by step guide of doing a clean install of windows 10 as of October 2020. If you are reading this 6 months on things may have changed slightly.
1. The first thing you will need to do is boot your computer from the Windows install USB you have created (click here if you have not created a Windows install USB). To boot from USB insert the USB stick in to a spare port then turn on your computer then immediately keep tapping the boot option key. Boot option keys vary from device to device common boot option keys which are found at the top of the keyboard are ESC, F8, F9, F12. If you fail at first to get the boot menu hold down the power button until the computer turns off and try again. Untill Windows 10 is fully installed disconect from the internet.
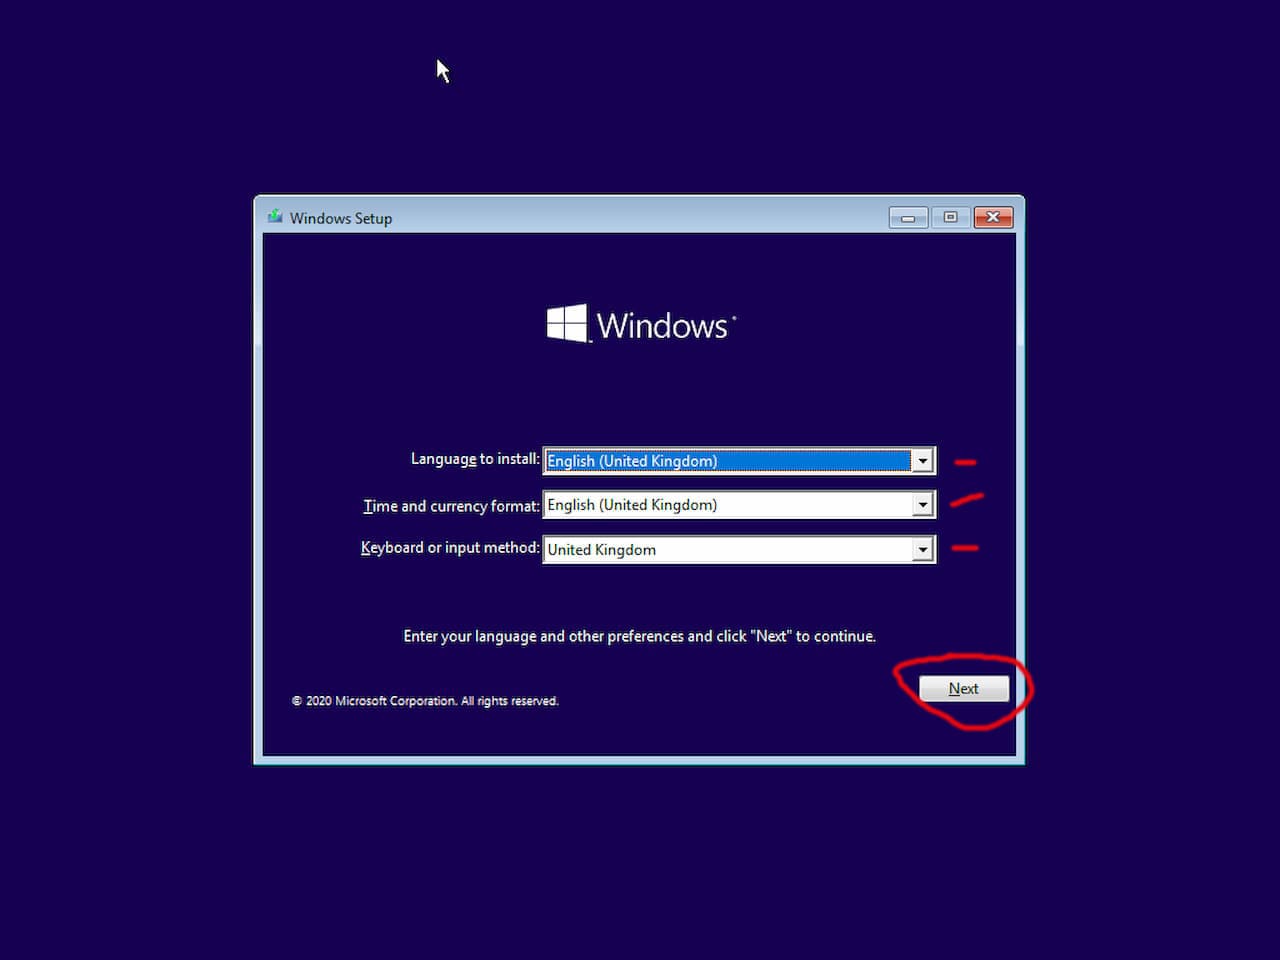
2. The first menu after booting from the USB will ask you to select a your preferred language. Select your language by using the drop down menus and clicking on the relevant one then click "next".
3. Click on "Install Now".

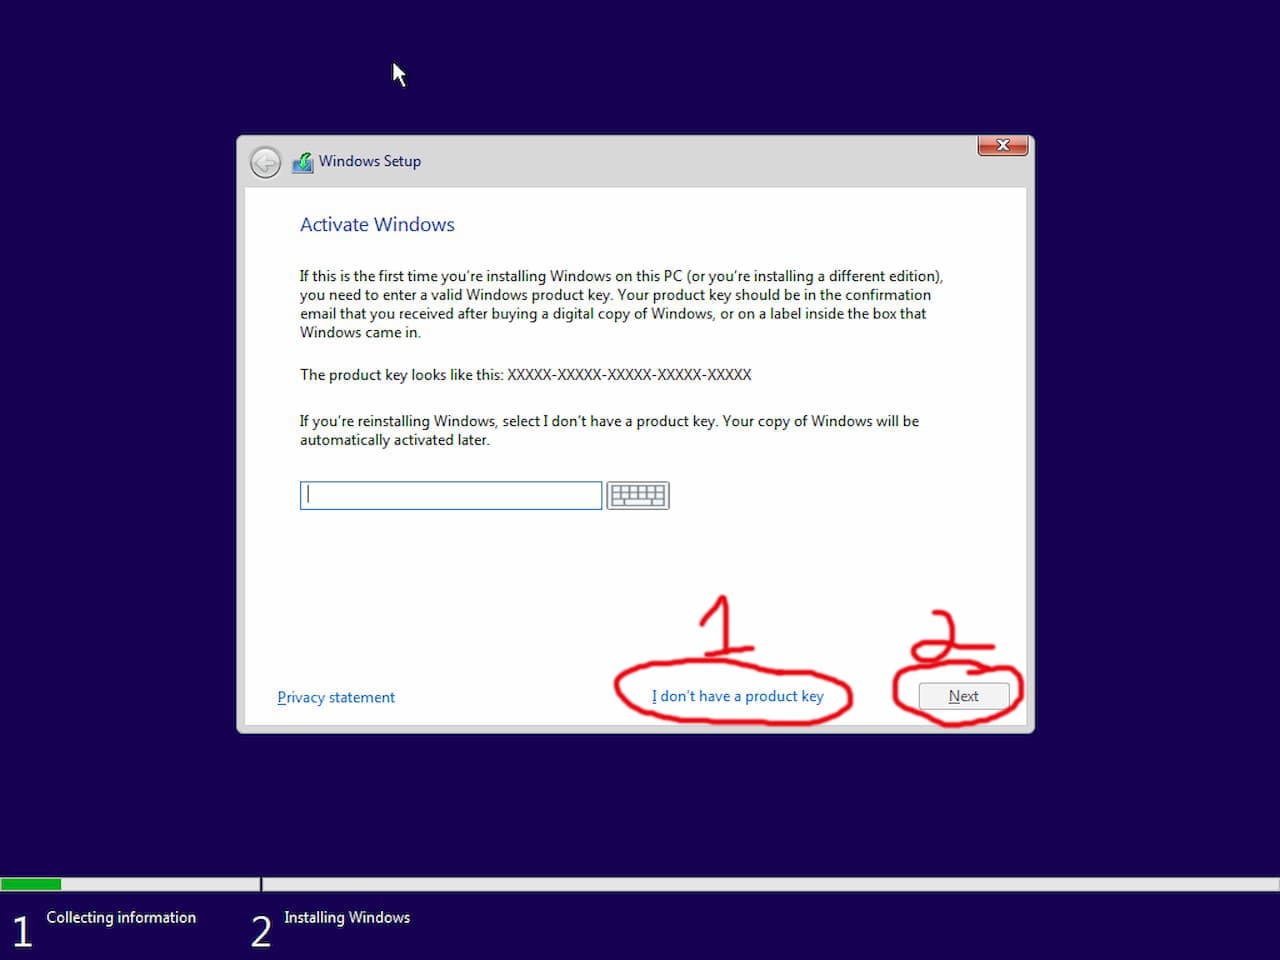
4. If you don't have a product key which you probably don't then click on "I don't have a product key". This sectiom will not appear if your computer came pre-installed with Windows 10, so scroll down.
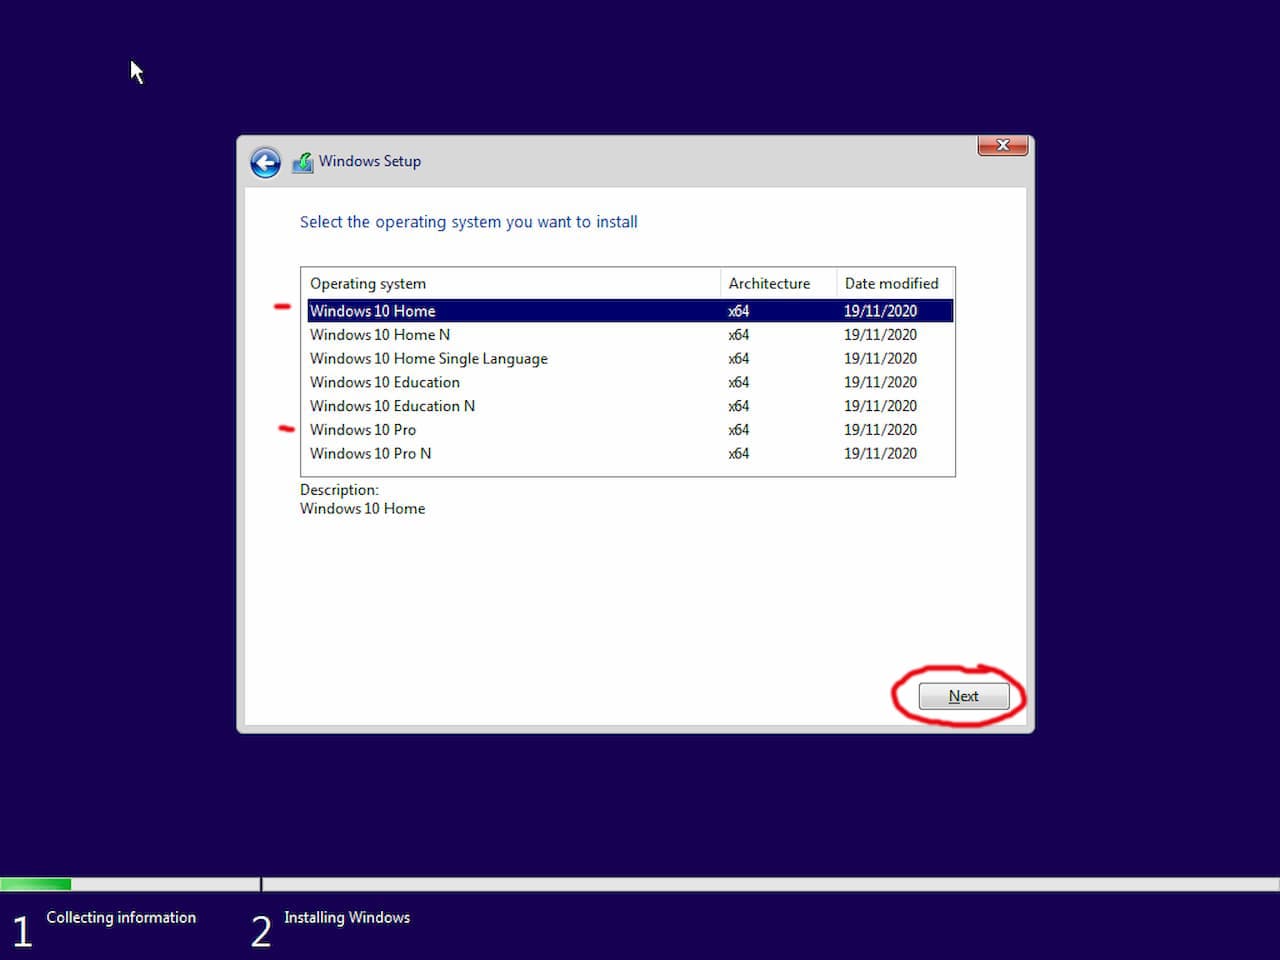
5. Click on the version of windows you have then click "next". If you don't know which version you have it can be found on the sticker with the windows logo some where on your computer. If you computer is not a business computer your version will likely be "Windows 10 Home".
6. Click the checkbox "I accept the license terms" then click "next".

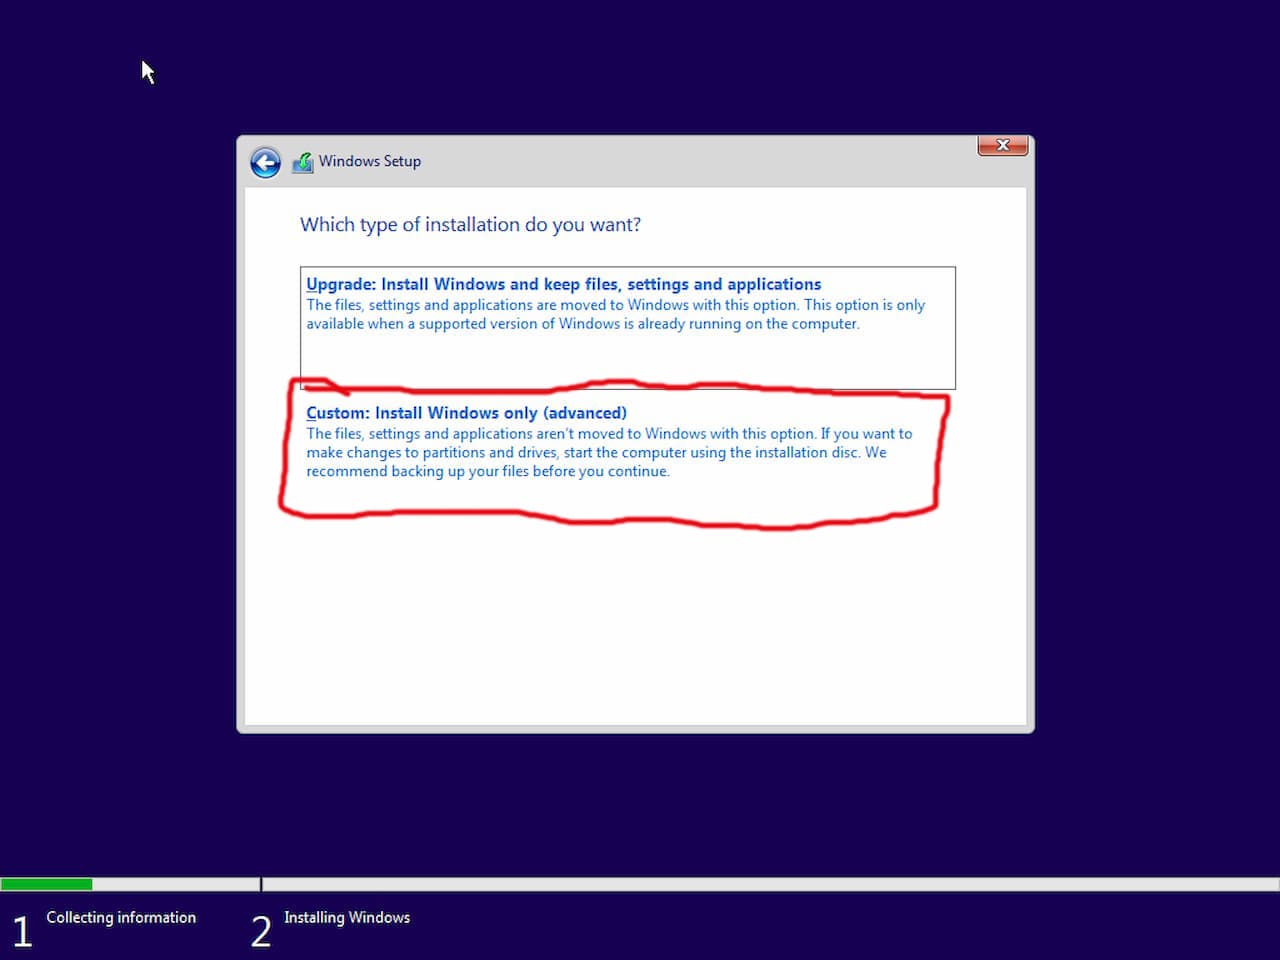
7. Click on "custom: install Windows only (advanced)".
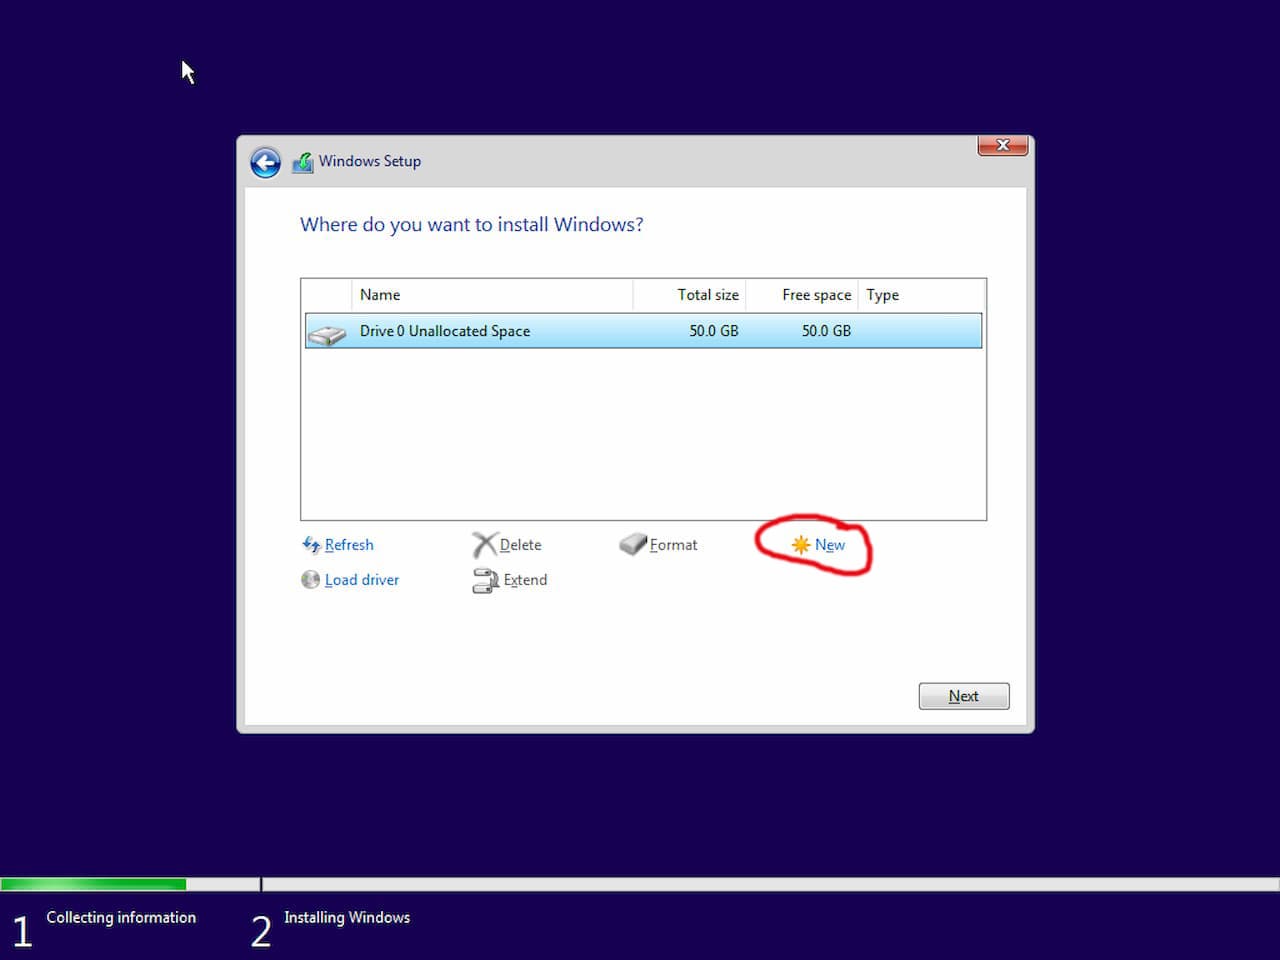
8. Click on each drive not labelled "Unallocated space" then click "delete" repeat until only one drive remains. If you have Drive 0 and Drive 1 then just delete Drive 0. If you have a Drive labled Data, backup or something similar then maybe don't delete them unless your are sure its safe to do so. Next click "New" on the largest unallocated space then click "Apply".
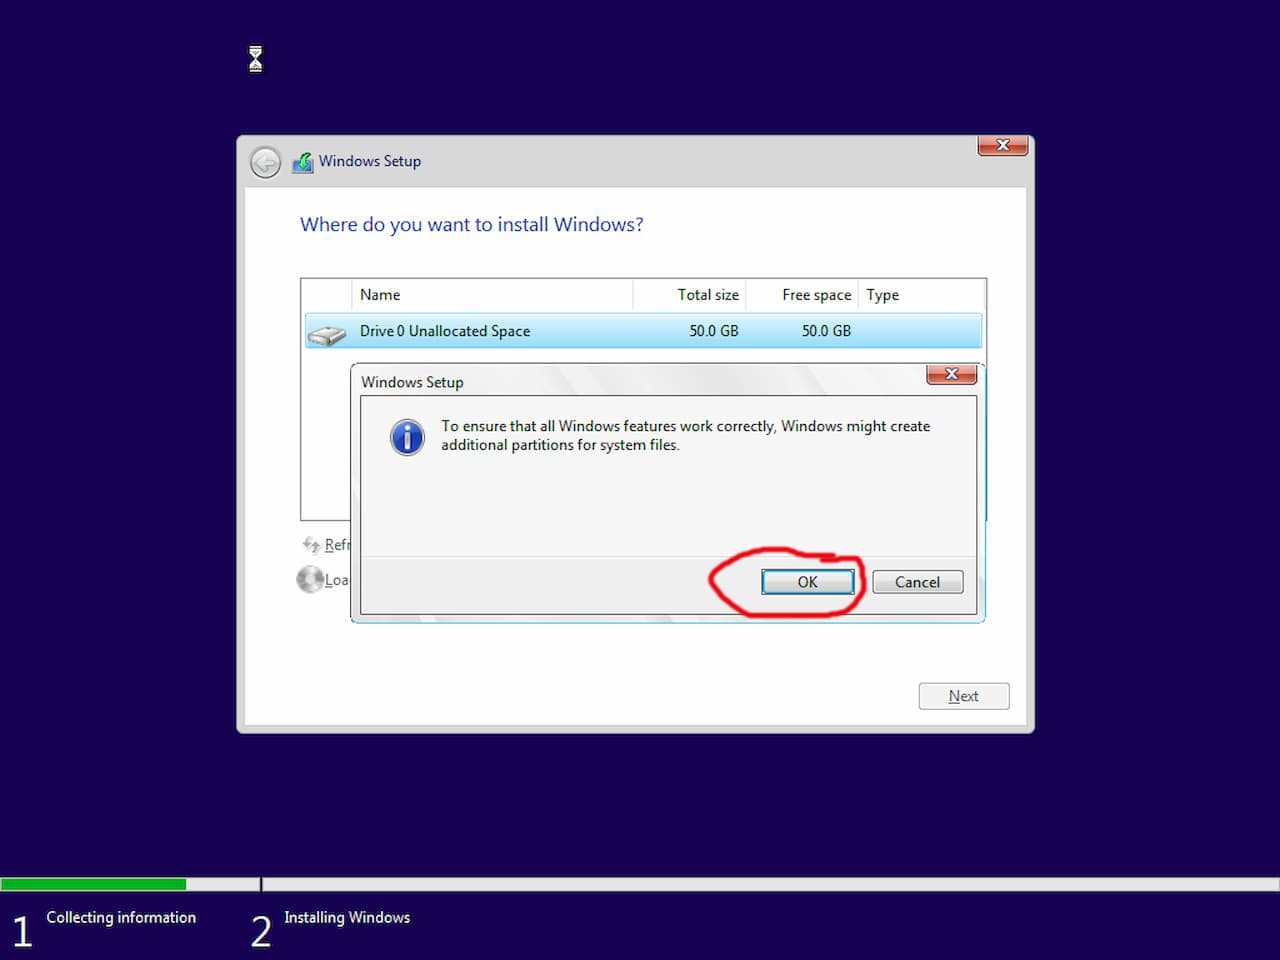
9. Click "OK".
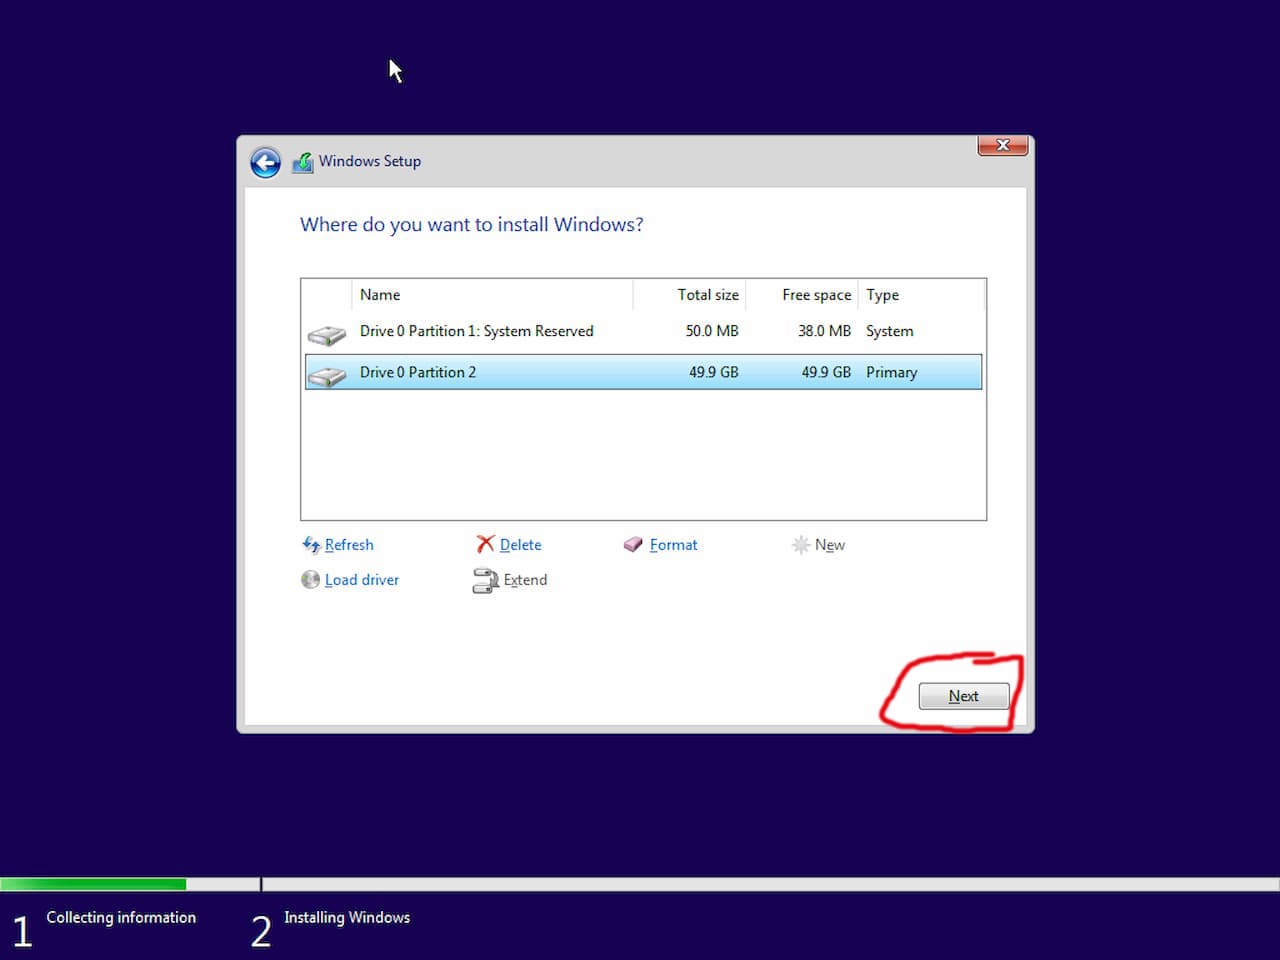
10. Click "Next".
11. Grab a cup of tea while windows installs. Your computer will reboot several times.
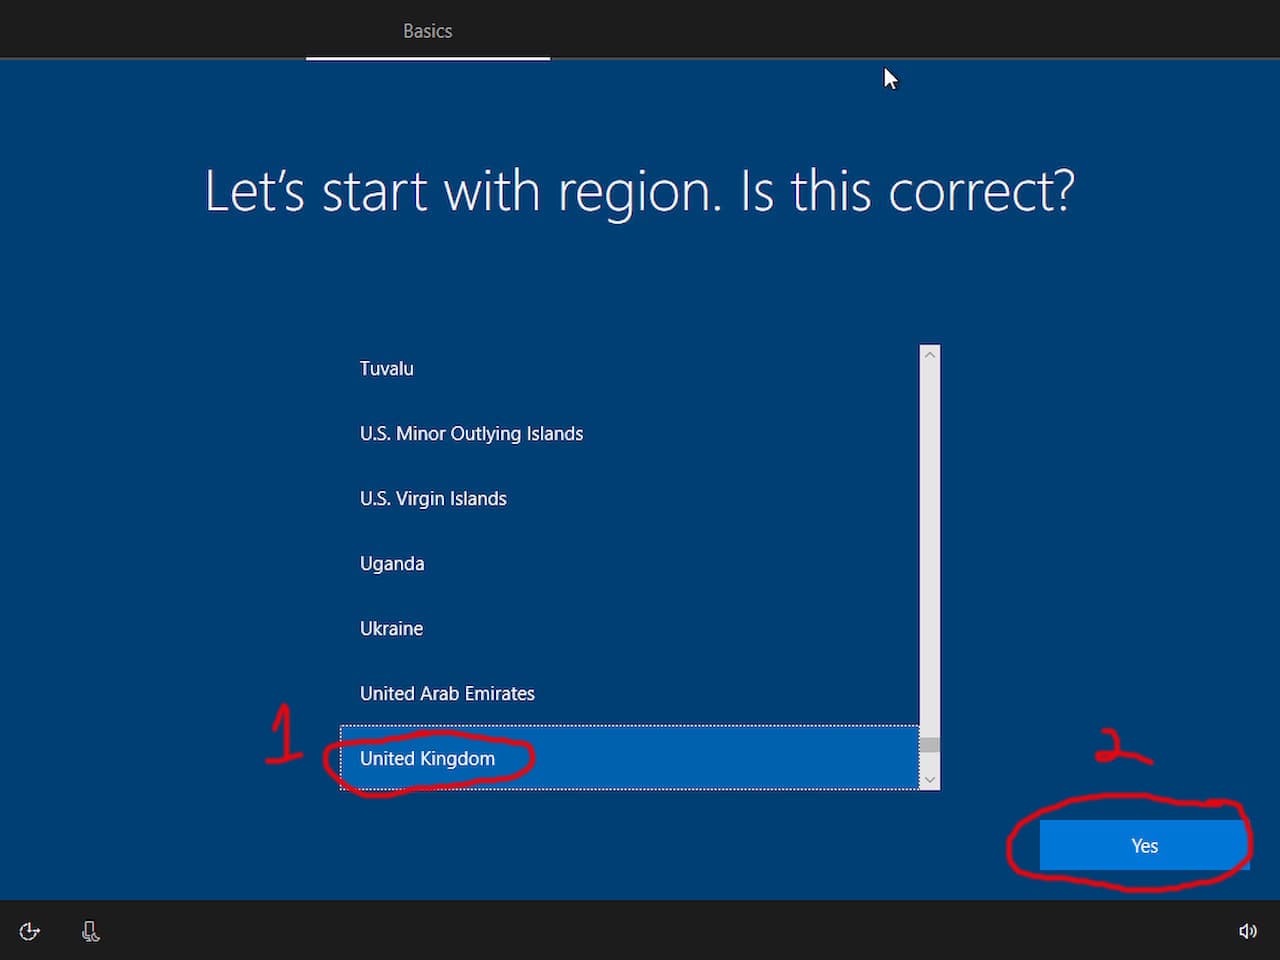
12. Click on the correct region if wrong then click "Yes".
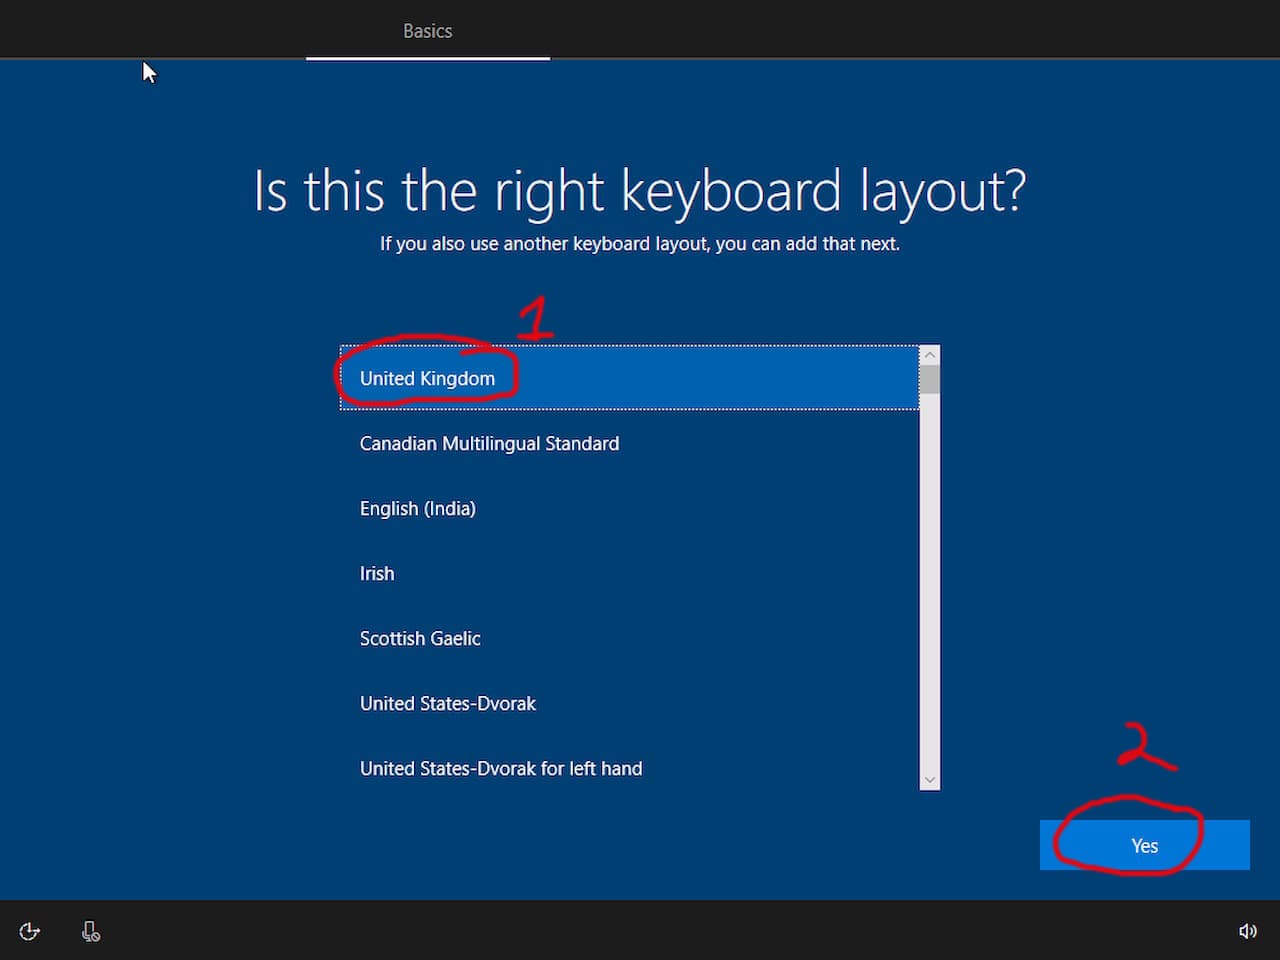
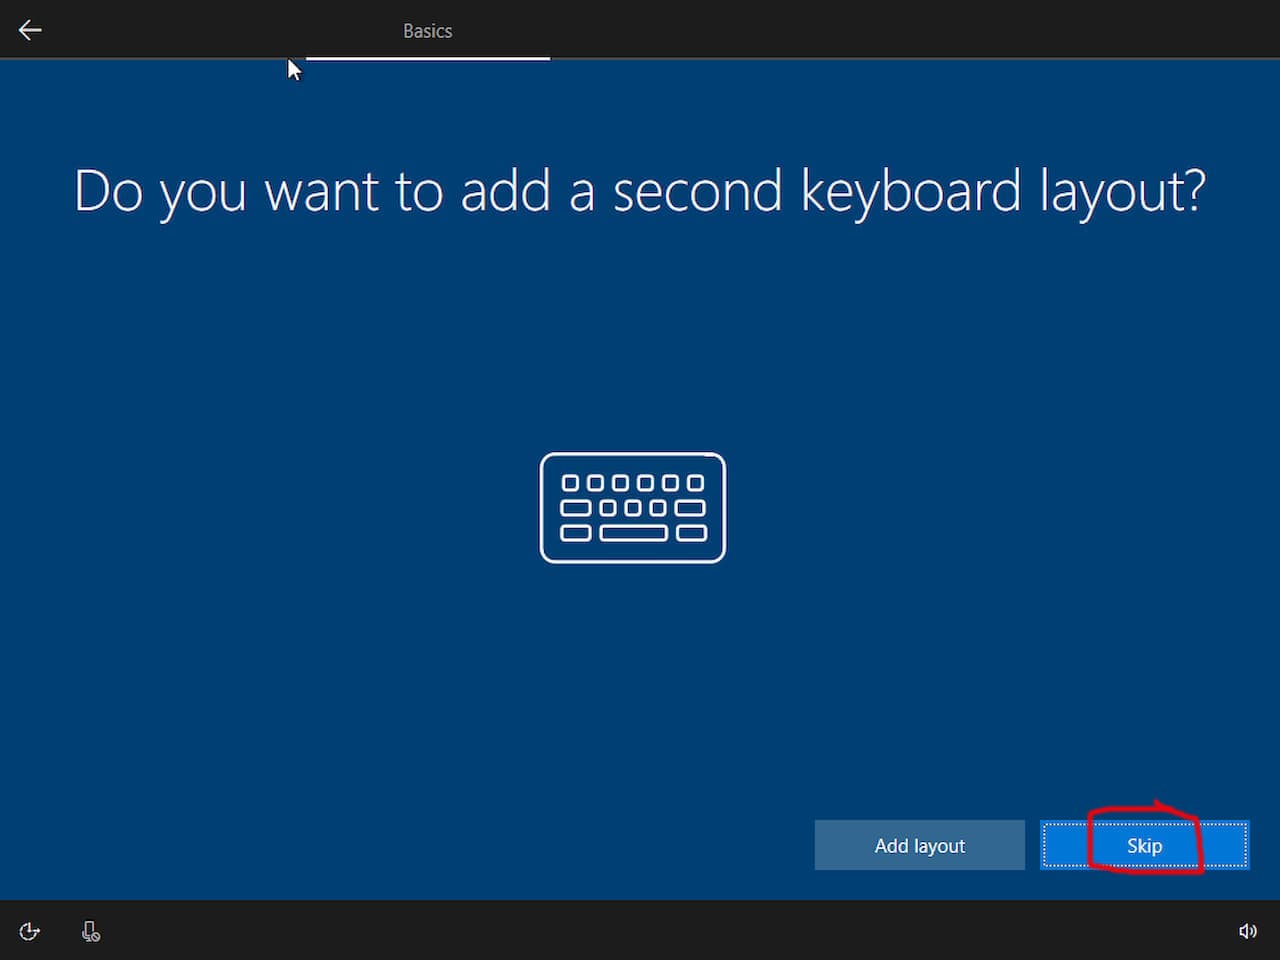
13. Click "Yes".
14. Remove your ethernet cable if you have one. Click "Skip".
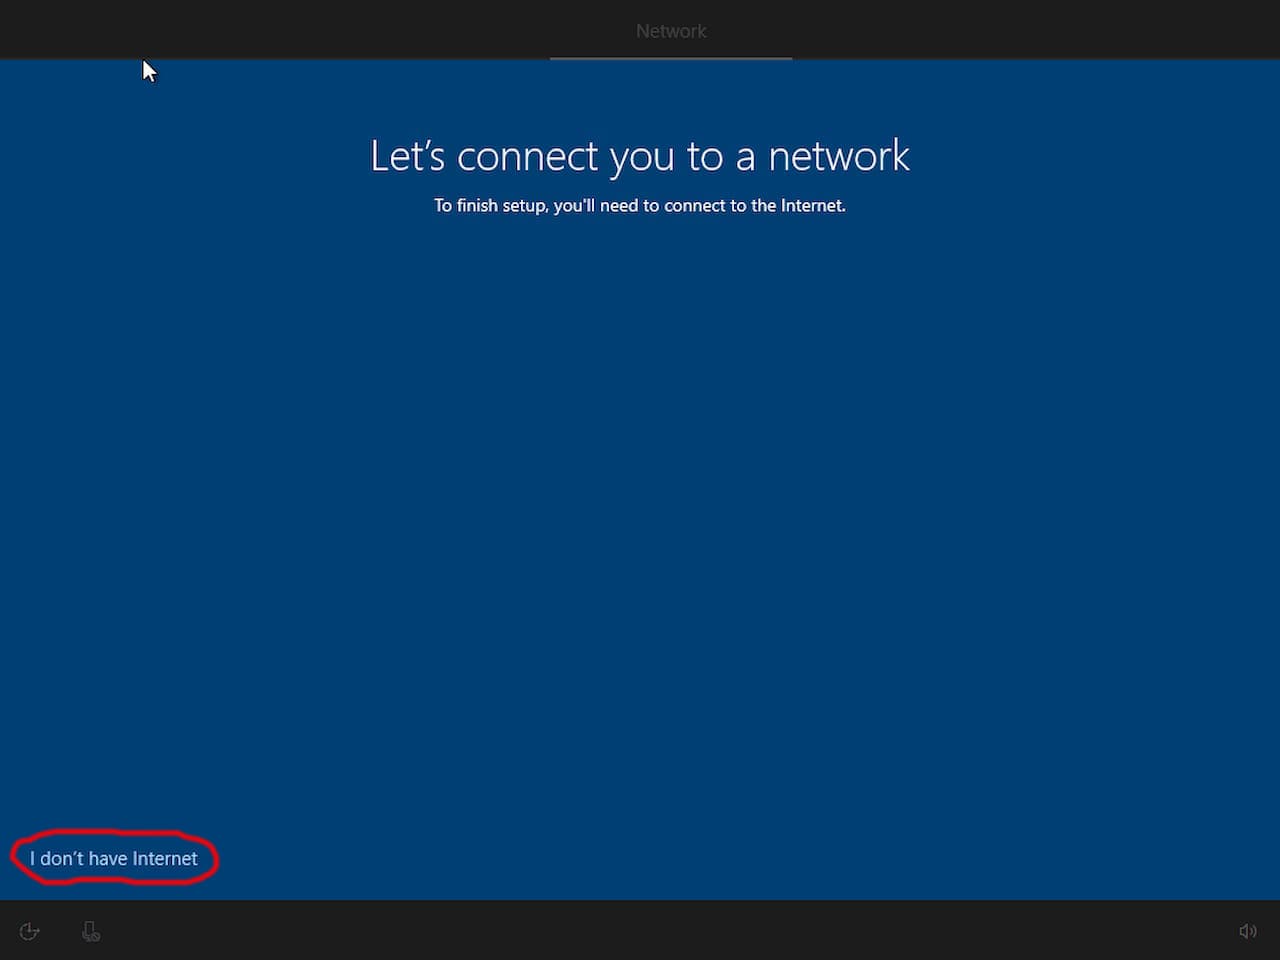
15. Click "I don't have internet".
16. Click "Continue with limited setup".

17. Enter your name then click "Next".

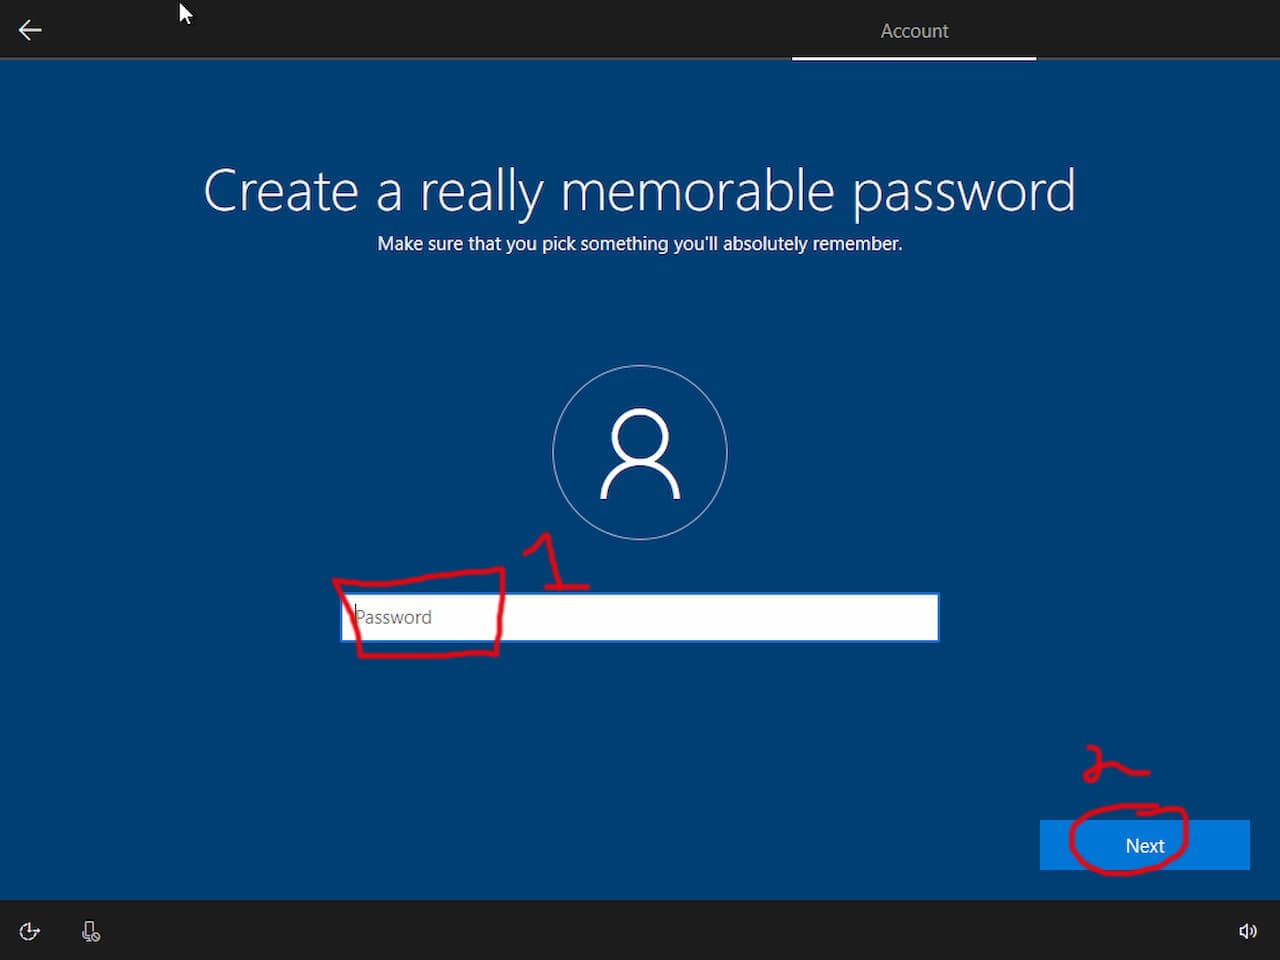
18. Create a password and enter it into the box then click "Next".
19. Re-enter the password from the previous step then click "Next".
20. Enter a password hint, I suggest not putting a real hint for security. Click "Next".
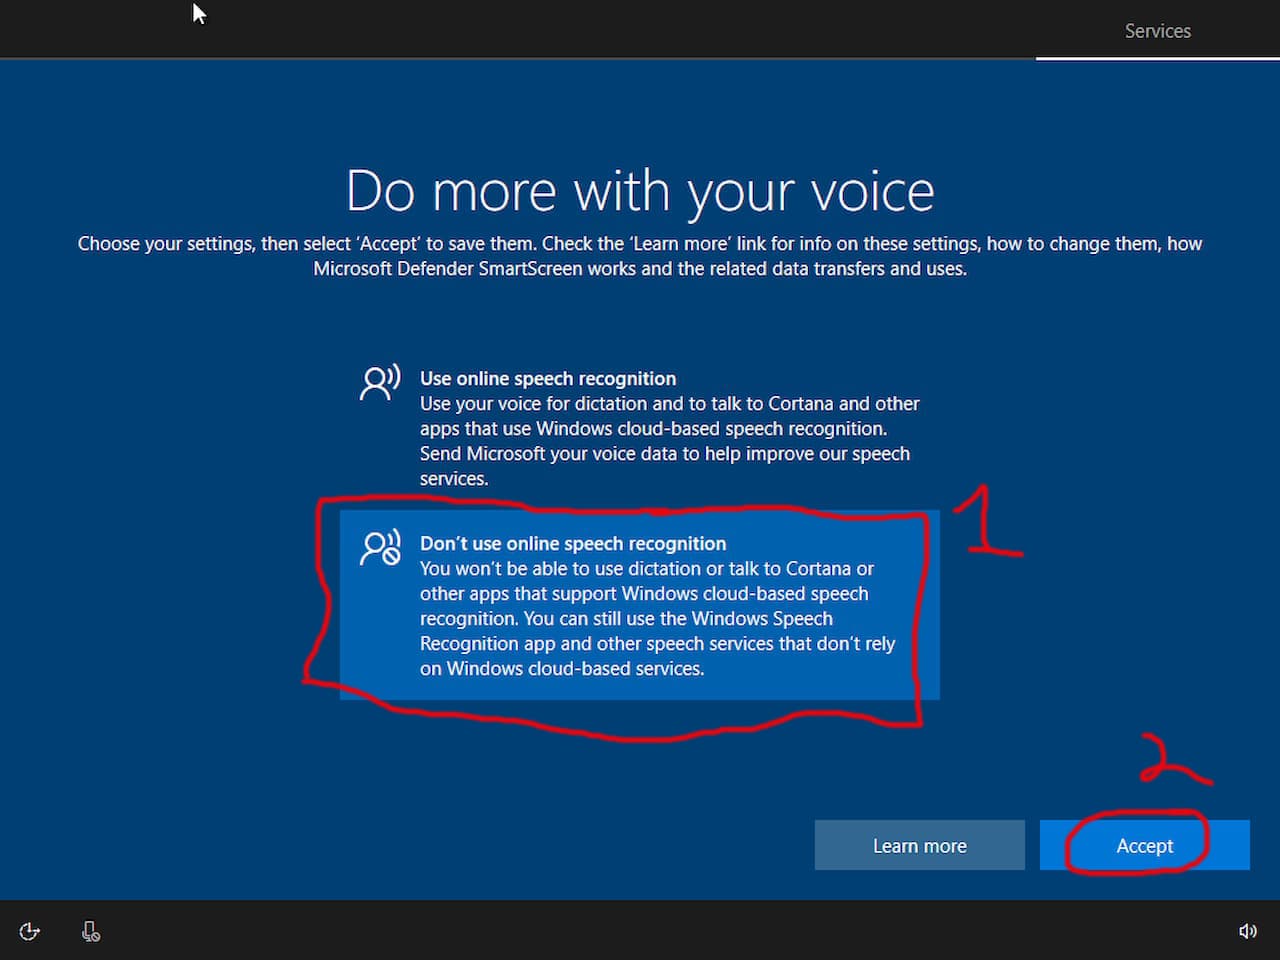
21. Click "Don't use online speech recognition" then click "Accept".
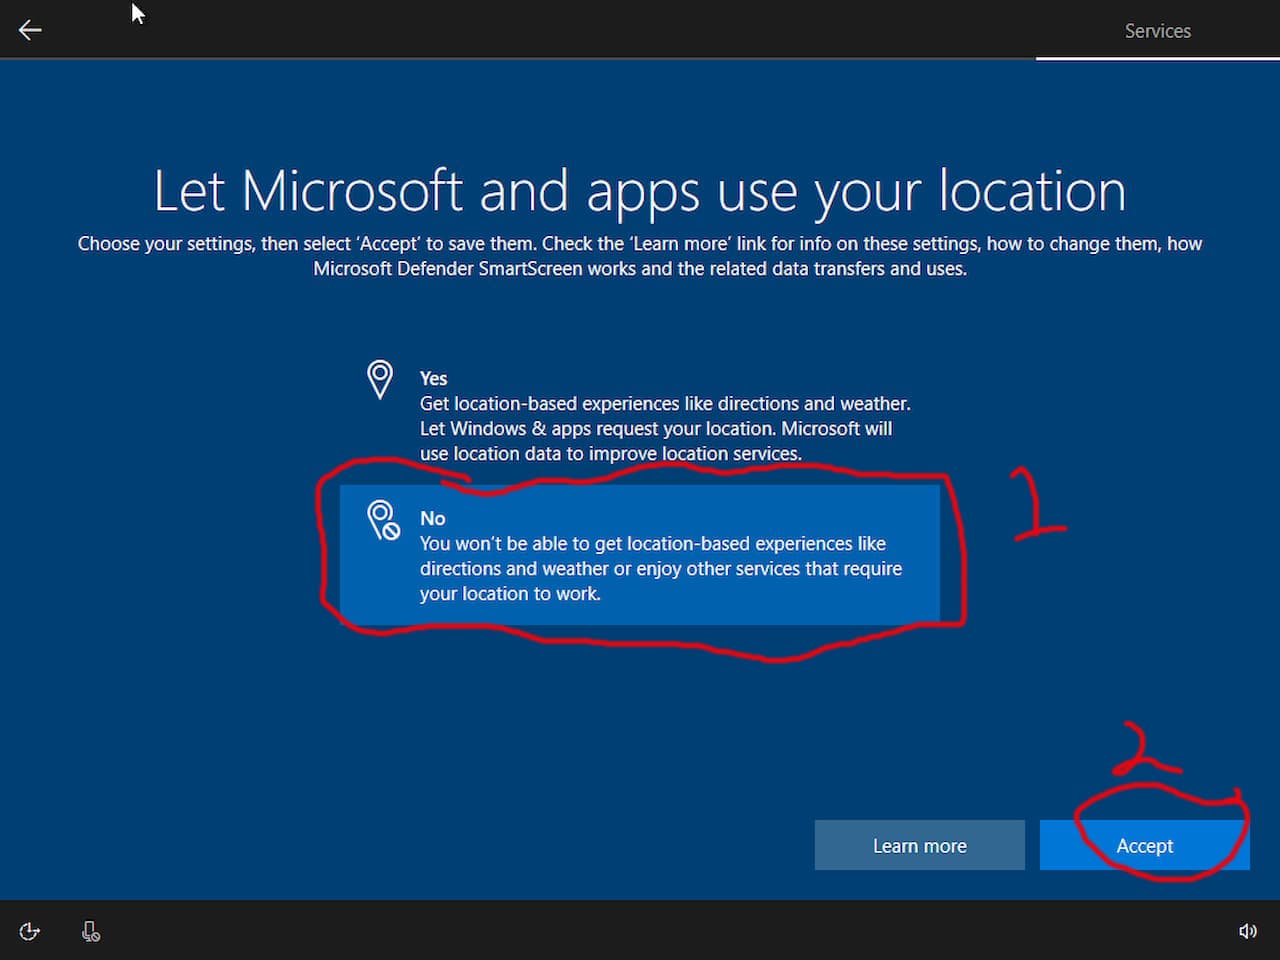
22. Click "No" then click "Accept".
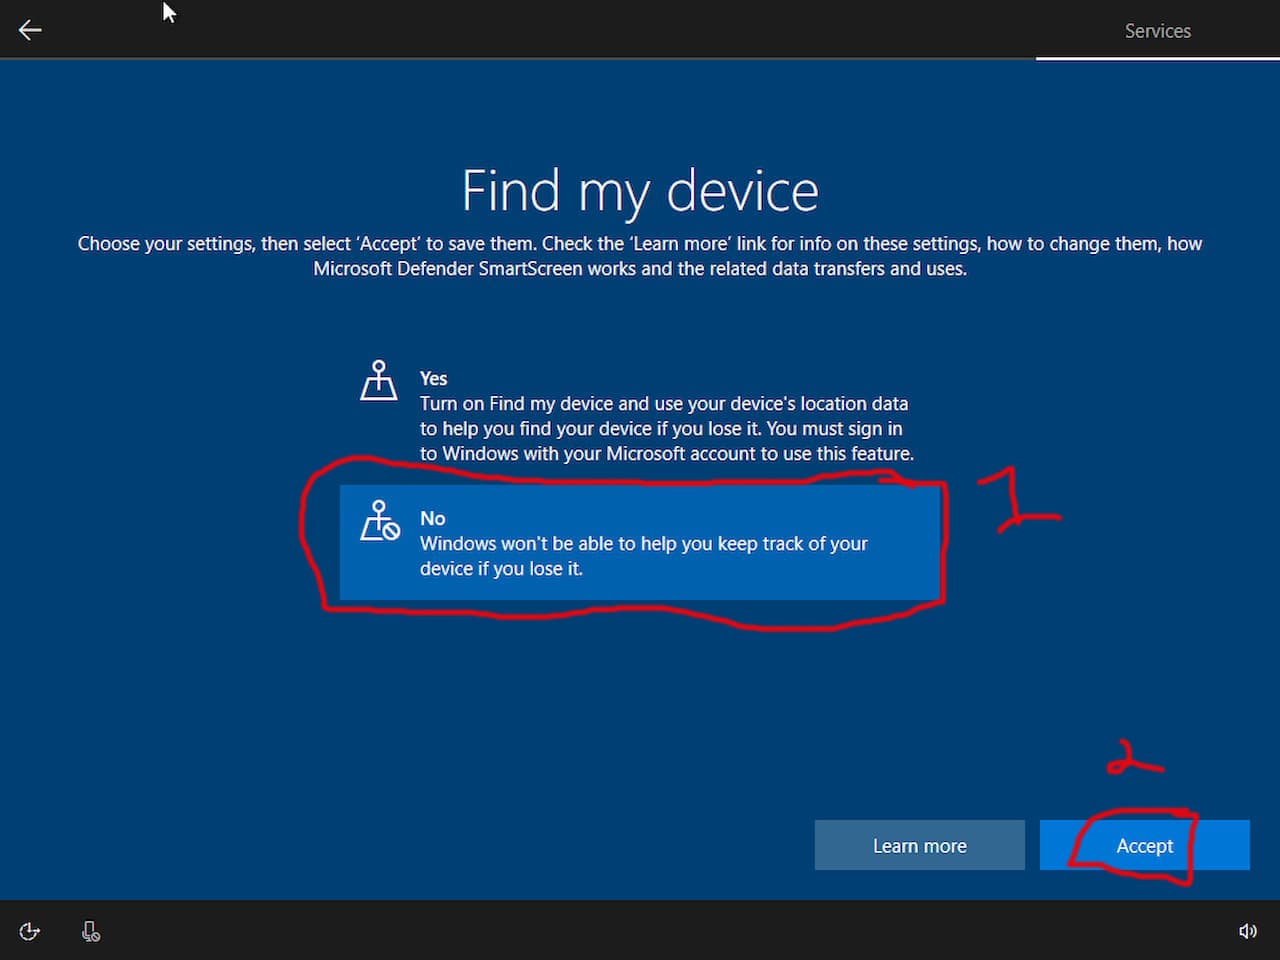
23. Click "No" then click "Accept".
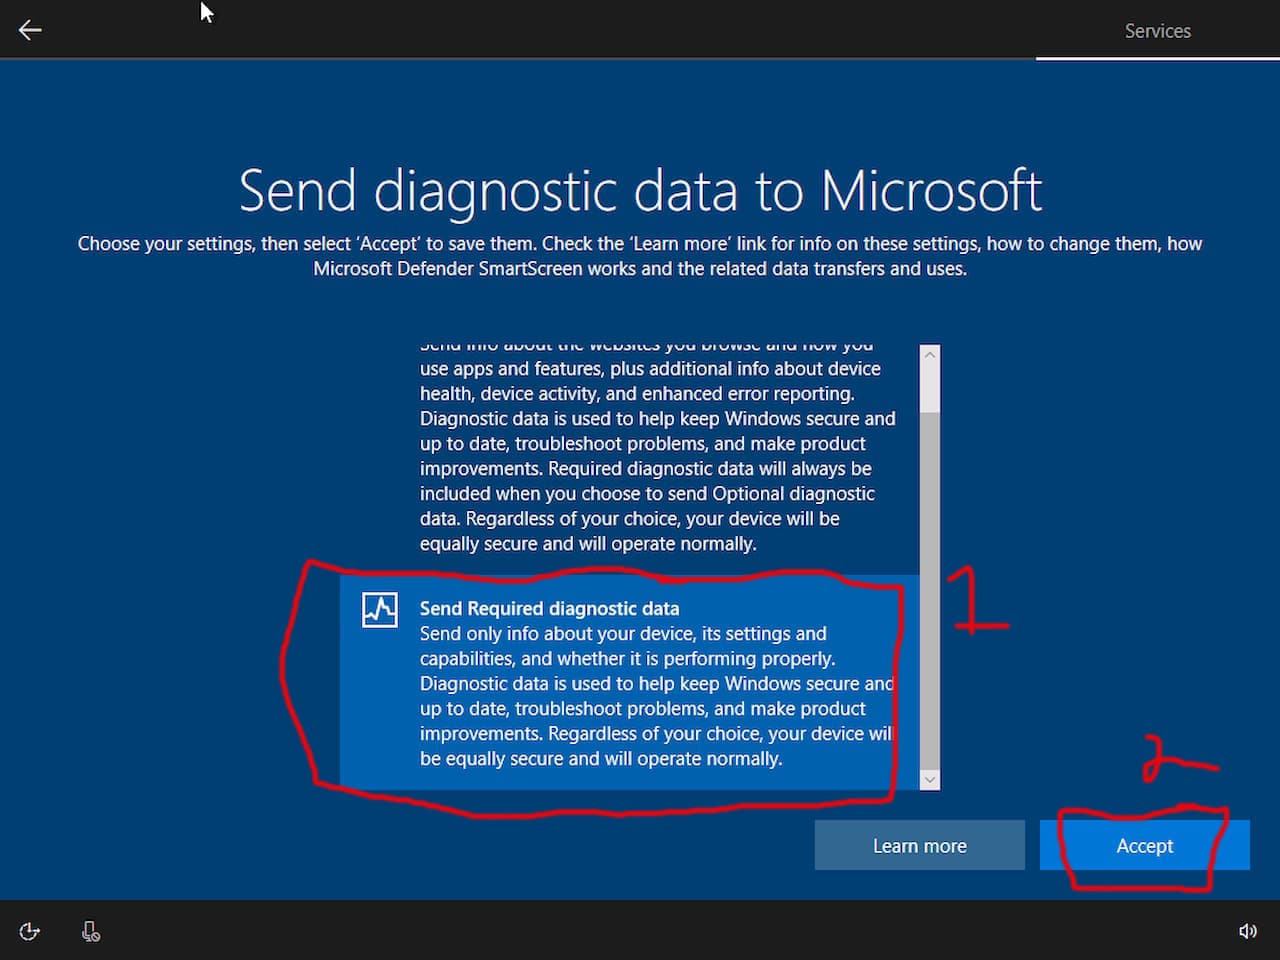
24. Click "Send Required diagnostic data" then click "Accept"
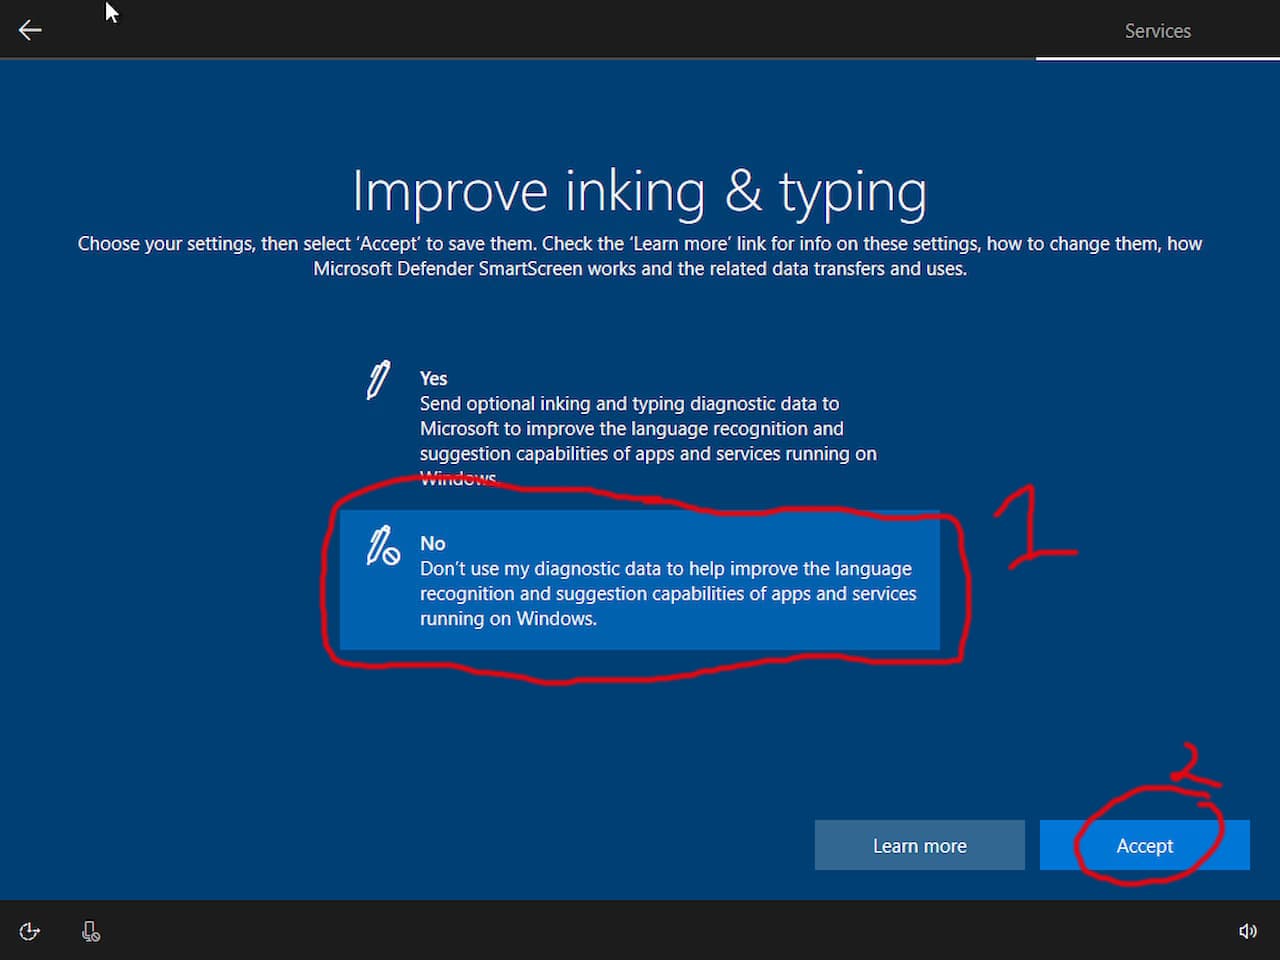
25. Click "No" then click "Accept".
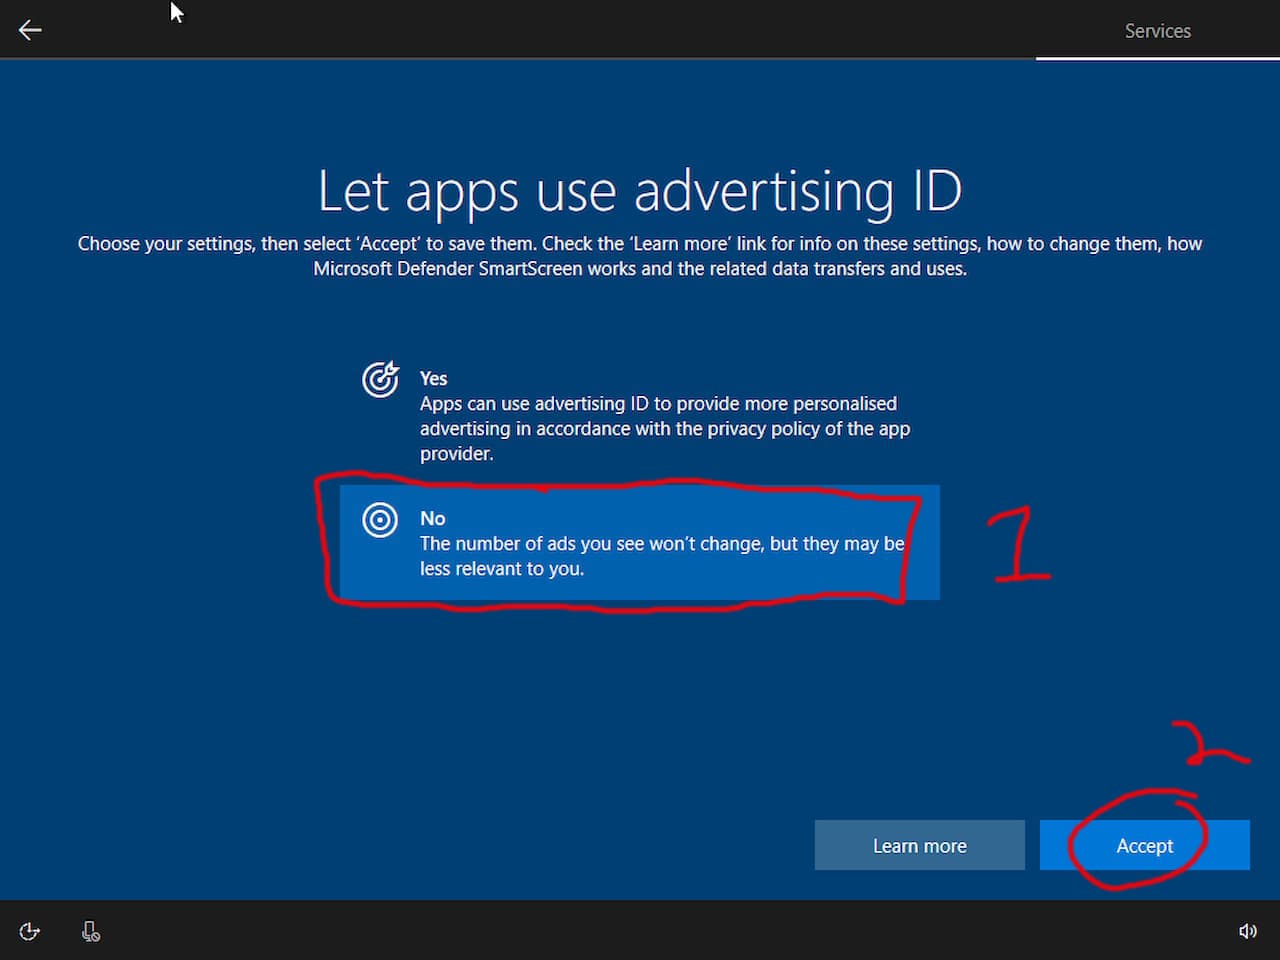
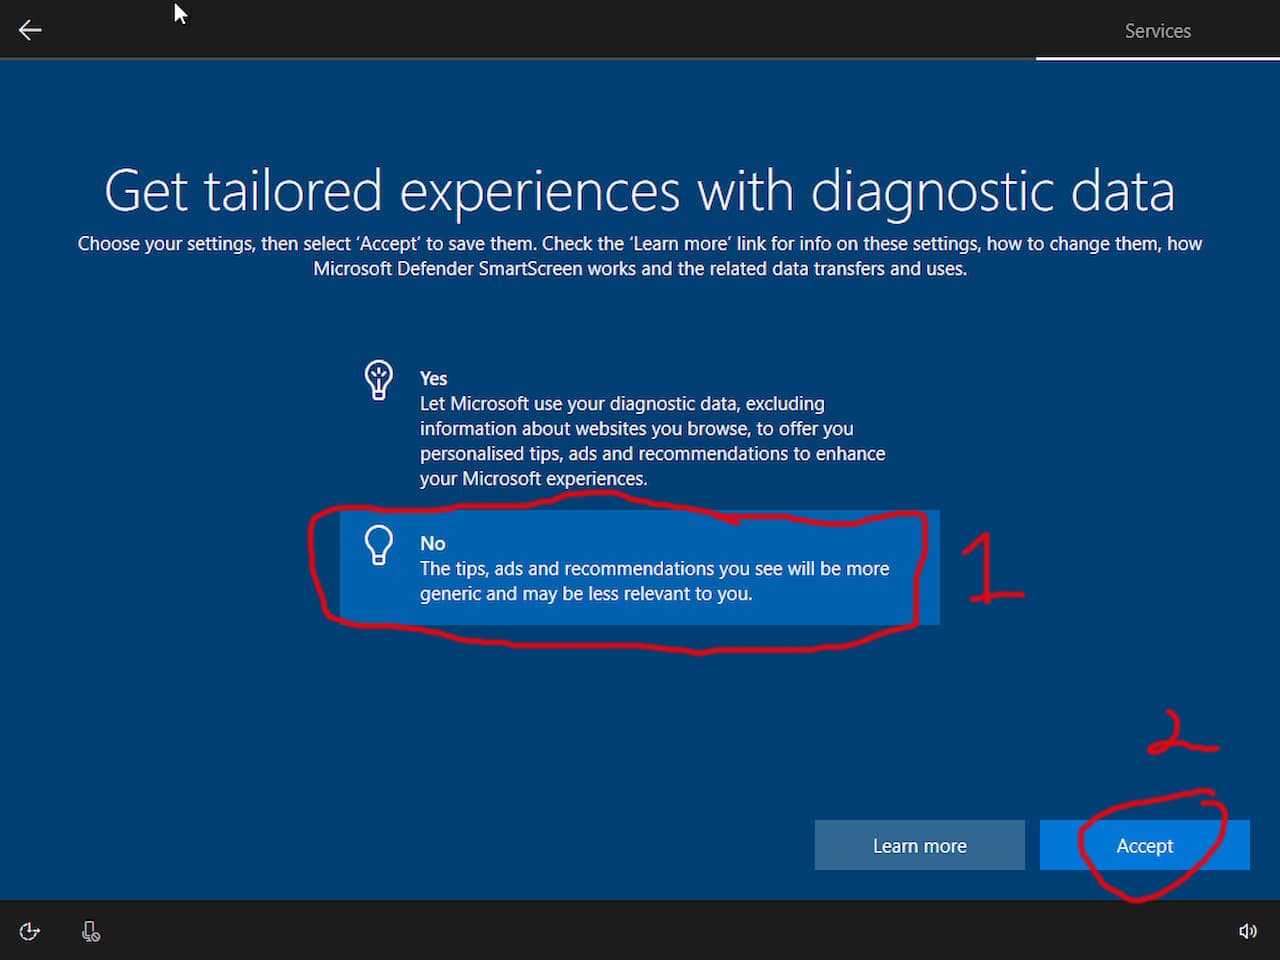
26. Click "No" then click "Accept".
27. Click "No" then click "Accept". This is the final step. After a few minuets you will be greeted with your desktop.